
Using a software to edit your photos is unavoidable. In different situations you may need to corp, paint, or adjust the panel size, white balance, brightness and contrast. In advanced usage, sometimes applying some appropriate effects on your photos will make them more striking.
I'm a software engineer and I'm very glad to find useful open source to resolve my problems. For editing photos, I recommend GIMP. And in this article, I would like to introduce GIMP and functions of it in common use.
What is GIMP?
GIMP(GNU Image Manipulation Program) is an open source which means it is free and you can have its source code if you want. It is maintained by GNU. The official site of GIMP is http://www.gimp.org/. You can download a copy and get its source code here. They offer different version for installation on Window, Linux and Mac OS. The documents cane be found on http://www.gimp.org/docs/. It is very important to help you understand GIMP.
Auto-Colorizing
I would like to introduce some auto-colorizing functions first. Those functions are very useful if you want to stress color. Besides, they are very easy to apply to images. Thus I recommend those functions to people who just get starting with photograph.
You can find these two functions in the path of Colors->Auto. The following figure is taking for reference. I think functions such like Equalize, White-Balance and Color Enhance are common in use. After applying them, your photo's RGB level will be adjusted automatically.

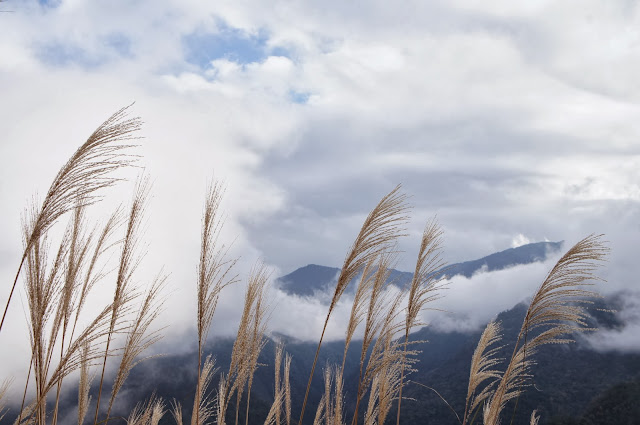
This is the original picture:

After applied auto equalizer:

This is an example before applied with auto white-balance.

Applied auto white-balance:

Let's see the last example which shows the difference between before applied auto color enhancing and the result.
The result applied auto enhance:

Brightness and Contrast
Sometimes auto colorizing would not be able to work good, especially your photo is too dark or contains people. At this moment, you can try to adjust brightness and contrast manually. The following figure shows the path of this function (Colors->Brightness-Contrast tool).

Original:

after adjusted Brightness-Contrast:

Colorize
To make photos looks like old fashion, normally speaking, it is a good idea to use Colorize to reach this goal. You can find Colorize in the path Color->Colorize.

This is the original pciture:

You can adjust Hue, Saturation and Lightness properly to make it look like as following:

Desaturate
Besides applying Colorize, another to make photos old I suggest to use Desaturate. This function can be found under Color->Desaturate. With using Desaturate, there are three algorithms you are allowed to use. They are Lightness, Luminosity and Average.

Original:

After applied Desaturate:

Overutre Y. Chao
06/10/2013
I'm a software engineer and I'm very glad to find useful open source to resolve my problems. For editing photos, I recommend GIMP. And in this article, I would like to introduce GIMP and functions of it in common use.
What is GIMP?
GIMP(GNU Image Manipulation Program) is an open source which means it is free and you can have its source code if you want. It is maintained by GNU. The official site of GIMP is http://www.gimp.org/. You can download a copy and get its source code here. They offer different version for installation on Window, Linux and Mac OS. The documents cane be found on http://www.gimp.org/docs/. It is very important to help you understand GIMP.
Auto-Colorizing
I would like to introduce some auto-colorizing functions first. Those functions are very useful if you want to stress color. Besides, they are very easy to apply to images. Thus I recommend those functions to people who just get starting with photograph.
You can find these two functions in the path of Colors->Auto. The following figure is taking for reference. I think functions such like Equalize, White-Balance and Color Enhance are common in use. After applying them, your photo's RGB level will be adjusted automatically.


After applied auto equalizer:

This is an example before applied with auto white-balance.

Applied auto white-balance:

Let's see the last example which shows the difference between before applied auto color enhancing and the result.

The result applied auto enhance:

Brightness and Contrast
Sometimes auto colorizing would not be able to work good, especially your photo is too dark or contains people. At this moment, you can try to adjust brightness and contrast manually. The following figure shows the path of this function (Colors->Brightness-Contrast tool).

Original:

after adjusted Brightness-Contrast:

Colorize
To make photos looks like old fashion, normally speaking, it is a good idea to use Colorize to reach this goal. You can find Colorize in the path Color->Colorize.

This is the original pciture:

You can adjust Hue, Saturation and Lightness properly to make it look like as following:

Desaturate
Besides applying Colorize, another to make photos old I suggest to use Desaturate. This function can be found under Color->Desaturate. With using Desaturate, there are three algorithms you are allowed to use. They are Lightness, Luminosity and Average.

Original:

After applied Desaturate:

Overutre Y. Chao
06/10/2013
沒有留言:
張貼留言